
|
I've decided to start a reoccurring post called "ban the worksheet" due to my frustrations of teachers using worksheets on a daily basis. Let me start off by saying I hate worksheets and they do not do anything for today's learner. My favorite subject to teach is math and because I teach the struggling students it's even more important they have daily activities that are hands on and authentic tasks. Most authentic tasks require little work on the teachers end and allow for easy differentiation. Having a simple rubric will allow you to grade while students are presenting or anecdotal notes as they work. Here are my ideas for elementary geometry activities. 1. Digital scavenger hunt After learning the main vocabulary, give student pairs/groups digital cameras and have them go around the school grounds taking pictures of these terms in the environment (inside or out). Some ideas for their hunt: 3 obtuse angles, 3 acute angles, 3 right angles, a set of parallel lines, perpendicular lines, a point, intersecting lines, different shapes or solid figures. If you have access to iPads, you don't even have to worry about downloading images off a camera, you can have them share on the iPad or use the computer application Reflector to reflect the images on your laptop and through the projector. You can even give students a grade on the rubric for their speaking and listening explanation of what their pictures fit each term. 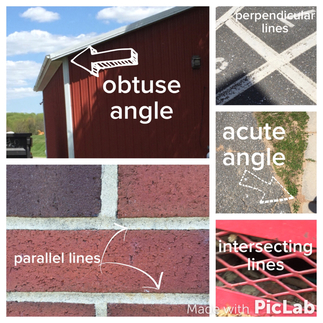 2. Map Measuring Find and print road maps of interesting places. Perhaps a map of your school district, a map of your city, or a different places you might be studying in science, social studies, or even a book you are reading in ELA. Ask students to measure different angles formed by intersections. For example, using this part of a map of downtown Baltimore, measure the angle formed by S. President St. and Eastern Avenue. Before even measuring the angles, you could have students identify intersections forming right, obtuse, and acute angles. 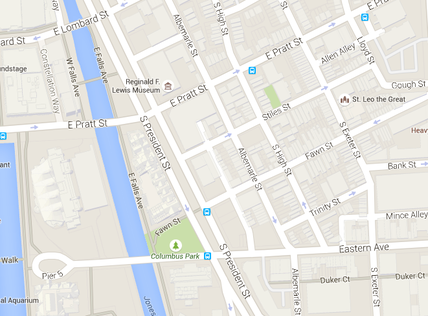 Google maps 3. Map Creation
Once students have mastered measuring angles, it's time to have them be able to create angles. Have students design their own city or town. Give them requirements that must be in their map and allow them to be creative. For example: 3 right angles, 2 obtuse angles, 2 acute angles, a set of parallel lines, a set of intersecting lines, etc. If you have an inclusion class, you can simple reduce the number of items the students need to have however they can still complete the same project. 4. Design a Robot - Quadrilaterals When working on the types of quadrilaterals, have students design a robot. They can either draw it (using grid paper often helps) or cut out paper and make a collage. It helps if they make their own quadrilateral glossary first. 5. Triangle Straws You will need a box of straws that are a mix of colors. I used neon colors. Give students a large size piece of posterboard or construction paper (12"x18"). Put on the board the 3 types of triangles when classifying by sides (equilateral, isosceles, and scalene). Ask students how they could represent each type of triangle with the straws and allow them to brainstorm in groups. Have students cut the bendy part of the straws off and arrange their straws to form the triangles. Once approved they can tape them down, measure and label each side, and then label the type of triangle. Fox News, The Kane Show, BBC Radio, E!, Buzzfeed, Time, People, NBC news, ABC news, and 2.5 million views on YouTube… I believe that is called “viral”. What is now a viral photograph and story, all began with a ten-year old boy. In the end, that is the true center of this incredible story. The last week and a half has been overwhelming with the attention this story has gotten. As Christopher’s special education teacher, I am so unbelievably moved by the entire experience. I became a teacher because spending time with children gives me purpose in my life. The now famous Warner family became part of my life in the school year of 2011. Matthew and Christopher were twins with Down syndrome and I was going to be Matthew’s teacher. The day I met Matthew was our sneak-and-peak before the first day of school. I could hear the crying from down the hallway. As I entered the classroom, there was a tiny boy with glasses and the biggest puppy-dog eyes lined with long eyelashes any girl would be jealous of. He was throwing a fit on the floor and had tears streaming down his face. New places can be scary for anyone. His twin brother, Christopher, was in the next classroom playing with toys and admiring his new desk. I wondered what I had gotten myself into and if I would be good enough to be Matthew’s teacher. Little did I know I would fall in love with these two boys and their family very quickly. 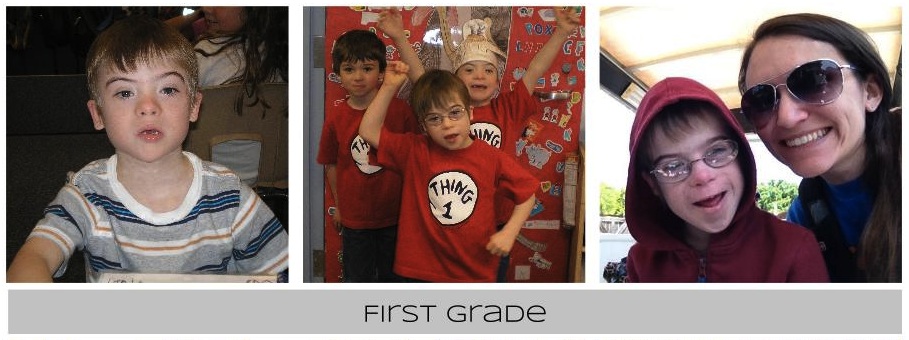 The following summer, I went through an incredibly difficult event in my life that left me blindsided and lost. When the family heard what happened, I was welcomed into their house and showered with hugs and love from the boys. Being in their presence took all the sadness out of my life. They truly have a superpower of love, as does every child with Down syndrome I have ever met. I buried myself in my work. I followed Matthew to second and third grade. Over summers we would meet for play dates like Pizza Hut, Chick-fil-a, and the farm. It served two purposes: getting to spend time with the boys and also having events that helped me plan their writing once school began. 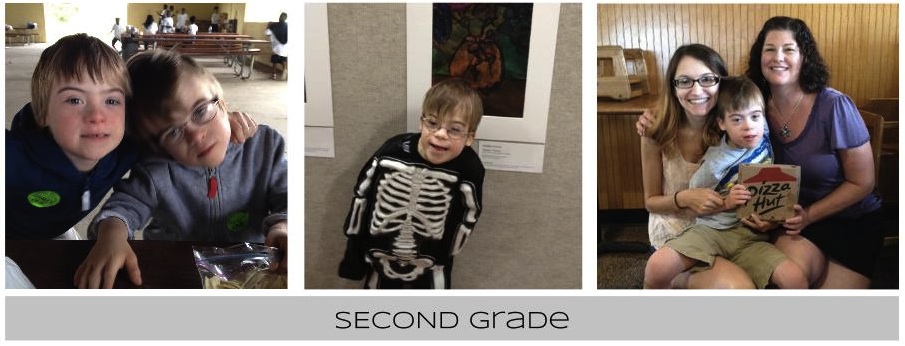 Being a special education teacher results in a different kind of relationship with parents. The parents of students with significant disabilities have to instill a significant amount of trust in you to keep their children safe and to advocate for their best interests on a daily basis. 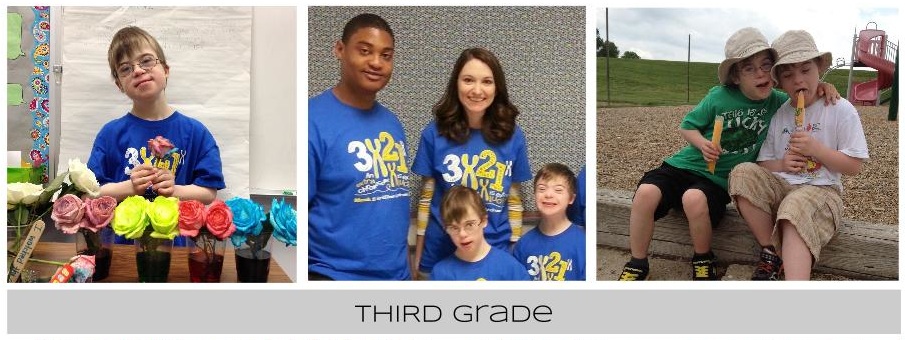 I signed on to teach both Matthew and Christopher for fourth grade, along with the rest of my amazing students. I loved getting to learn more about Christopher and just how different the boys were from each other. When I would long-range plan with the fourth grade team, I would look for ways to connect their learning to the curriculum but still have purpose for them. I also looked for ways to integrate technology into learning. 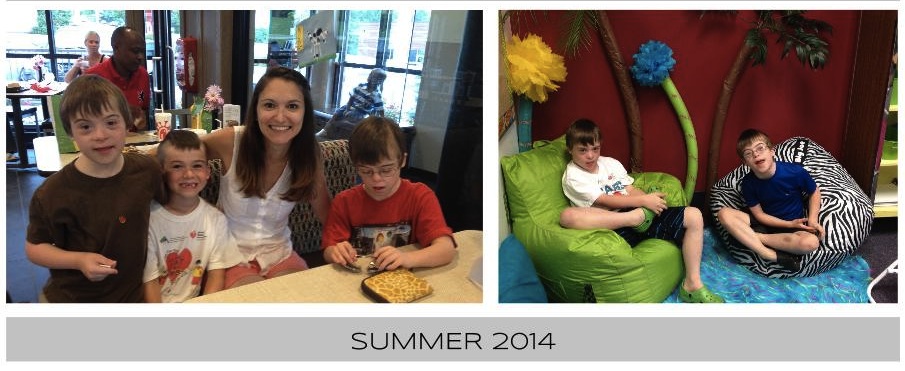 At the same time, I have been working on a 2-year masters degree program in Educational Technology through Loyola University. Every week, I would leave class and try out something new to enhance learning for not just the students on my caseload, but the classes I co-taught with. I was in the middle of a Multimedia class and the topic was the power of using movies with students. Christopher and Matthew are no strangers to movie making. Last year, Jay (who I have been blessed took not just the job of the twins’ student assistant, but my friend as well) helped me film a video for Matthew’s social studies project about helping people. This year, Christopher was learning about the desert biome, so we made a movie in front of the green screen as if he was a tour guide in the desert. I taught the boys how to edit the movies, add titles, and music. At Christmas time, the boys wanted to make a movie for our former principal to the song “Feliz Navidad” so we did. The boys were enamored in movie making and opportunities to watch themselves. 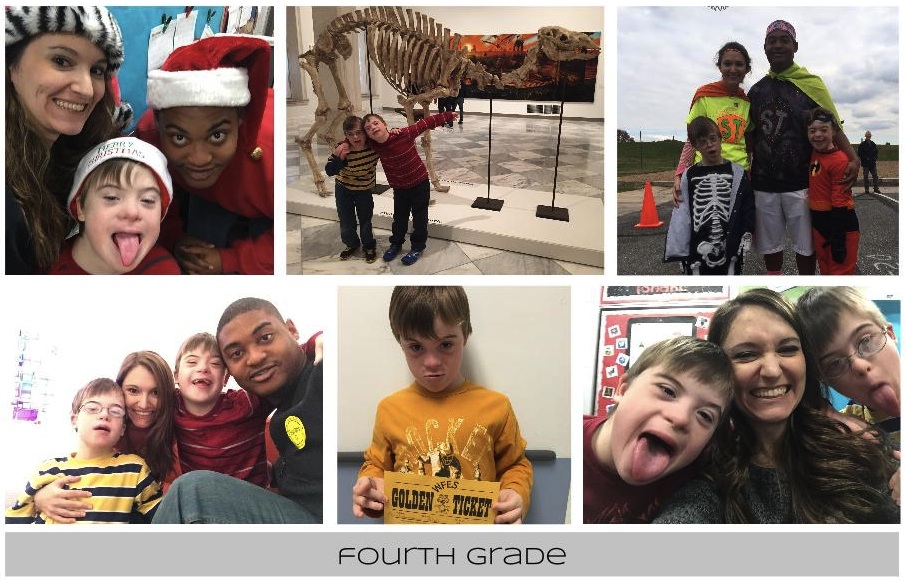 When Christopher’s love of Maroon 5 was clear, another reason to make a movie presented itself. Mary, who was his special educator in past years, asked me if I ever thought of contacting the band. With social media, there were a lot of ways, but it had to be the right one. We’ve all seen the pictures of the kid holding a sign wanting 10K likes floating around on Facebook. This was about the power of music and a picture wouldn’t be enough. I started filming Christopher as he worked on his projects and on his breaks. Jay believed in this dream too and didn’t think I was crazy for taking time to do this. He would get clips of Christopher on his days with him as well. We probably ended up with about an hour of footage. The next step was editing. It took a good part of a Saturday to get it to be just right. If it was too long, no one would watch it, if it was too short, it wouldn’t get the message across. My favorite part will always be when he gets excited seeing Adam Levine wearing glasses in his “Sugar” video. It’s a battle most days to get him to wear his own glasses, so I took mental note that Adam was helping the cause. After sharing the final product with Christopher’s mother and Jay, it was ready for YouTube. Christopher watched it 3 times that night. Jay, Cecilia, and I worked to spread the word via social media about the video. I woke up Sunday morning to a news story link in an email. When I saw that it was about Christopher I almost dropped my coffee. Turns out, Brendan O’Connell, a WFES alum, saw the video through a local Facebook group and took the story to Fox 5 News, who he worked for. This lead to a series of news segments. 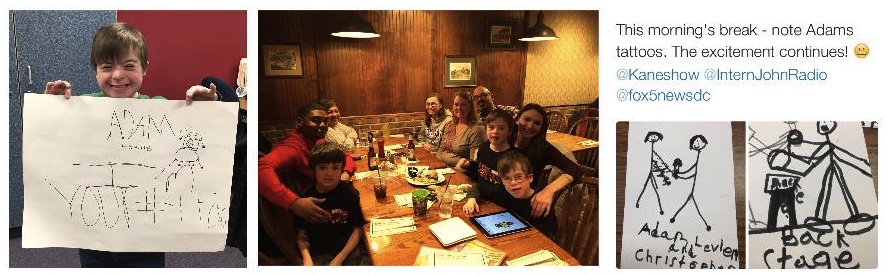 Monday morning, I tweeted the news article link to The Kane Show, asking for their help. I listen to them every morning on my 50-minute commute to work and they are always praising teachers and wanting to help them. Next thing I knew, I was being interviewed live on the radio and they had found a way to make Christopher’s dream come true – tickets and backstage passes to the show the following week! I couldn’t believe all of this was happening. That afternoon, Fox 5 News came and interviewed us for their 5:00 news. Both The Kane Show and Fox 5 News have been the ones who believed in Christopher's dream long before the viral photo and I am truly appreciative. 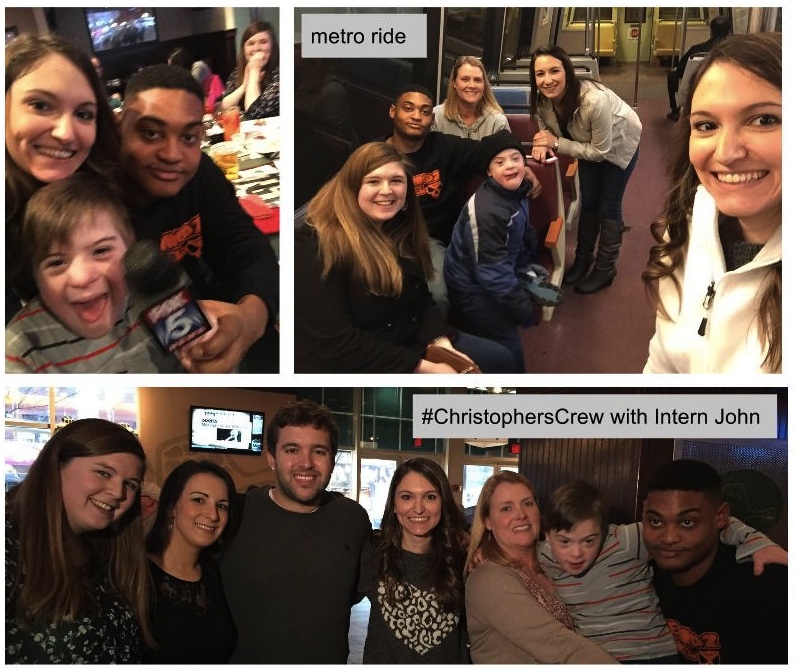 This is where there are a lot of stories out there that have a lot of errors. News sources have taken stories and tried rewriting them, so they get twisted. People who weren’t there and don’t know anything about the situation want to pretend they know all. The only important story here is what Christopher experienced and will remember. The infamous pictures were taken and Christopher left with a lot of Maroon 5 swag and his dream come true. My personal favorite is that the band autographed a drawing Christopher made of them. After the concert, the photograph went viral, and we were receiving calls and emails from every news and entertainment outlet in the world. The fact that Christopher reacted this way tells me that he truly understood the magnitude of what was happening. I’m so unbelievably happy he got to meet the band and see them in concert. After the concert we asked Christopher who got scared, him or Adam Levine, and he said, “I got scared”. That night he went to bed happy in his Maroon 5 shirt after the evening of a lifetime, not because he was in the news. 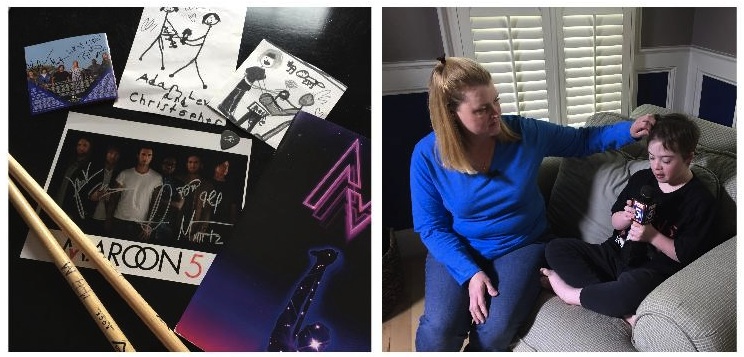 I hope a few outcomes will result from this event. I hope people will understand that kids with disabilities are true heroes who have to work at least twice as hard as any other student. Everyone learns differently and has different interests and we need to respect that in every child. Tapping into kids’ interests drastically improves their learning and engagement. Believing in them and truly getting to know them as people and not reading levels or test scores makes a difference in their lives. You don’t have to make world news to make a difference in a child’s life. Going to soccer games, art shows, dance recitals, school events, and encouraging your kids to invite you to their events helps you build relationships with them and their families. I hope that people will know kids with Down syndrome want to be treated like their peers, feel accepted, and be labeled as kids first. These boys and this family have changed my life. News stories fade, but for the rest of my life, I will have the privilege of being part of their lives, and watching them grow, learn, and most importantly, be happy. (special thanks to the family for allowing me to share)  Many thanks to: Jay Hackett, Mary LaRocco, Western Howard County Shares, Brendan O'Connell, everyone from the Fox 5 News team that was part of this, The Kane Show and Intern John, an anonymous parent, Lauren Watts, Samantha Mathis, and The Greene Turtle DC.
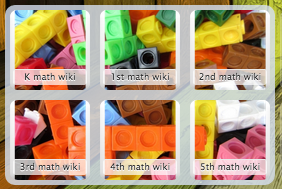
I experiment with different technology tools on a regular basis. There are a few that were love at first site! For me to really love a resource means it must be easy to use to I can convince others to use it. It should also have a free version because let's face it, we aren't using these tools to make money, we are using them to engage and empower our learners. The resource must also be useful for all different subjects and types of learners. Being a special education teacher, I teach in 2 different grade levels a year, as well multiple subjects. Here are the resources I have been using lately and a little about why they are so great. 1. symbalooEDU 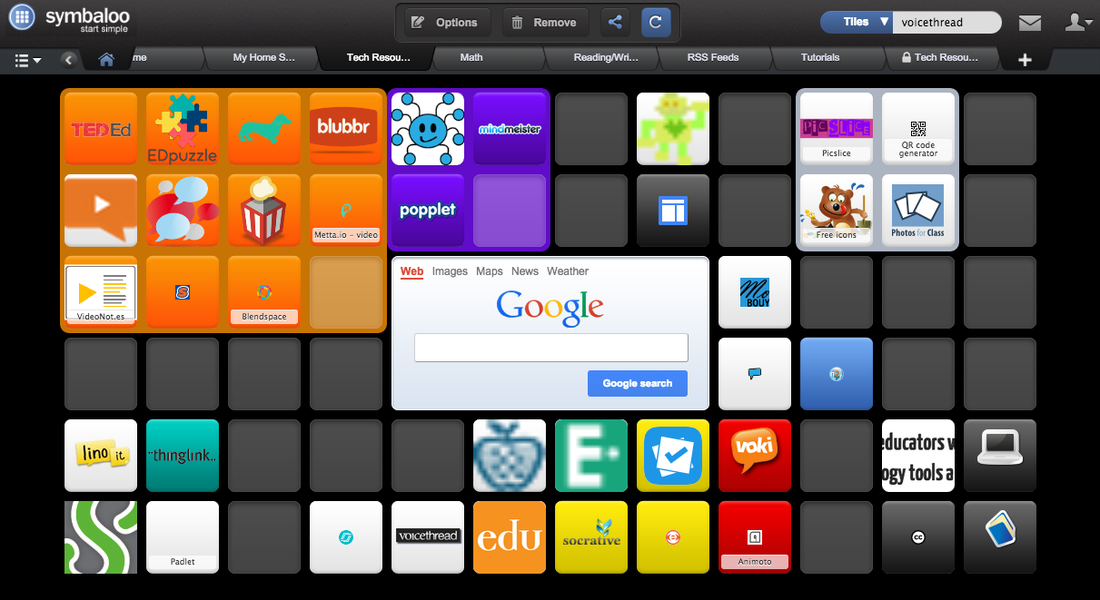 Symbaloo is an online bookmarking tool. There are 2 versions, symbaloo and symbalooEDU. You create "tiles" on a "webmix". A webmix is the screen with the tiles arranged on it. You can create multiple webmixes and the tiles can link to websites, other webmixes, RSS feeds, and embed files from Google Drive and YouTube. Being the color-coded person I am, I love that you can set a color to group tiles by a theme. For example, in the screenshot above, I grouped all interactive video sites in orange, all collaborative idea mapping sites in blue, and so on. Another reason I love symbaloo is that you can use it for flipped lessons. I could embed a YouTube video as a tile to give students background knowledge on a topic. Then have 3 tiles that had articles I wanted students to read, then embed a google quiz as a tile.
2. eduCanon Educanon allows you to turn an online video into an interactive experience. Not only is this great for students, but think about how much more engaged fellow teachers would be during professional development. Once you paste the link to the video you want to use, you can decide where you want questions. For the viewer, when they watch the video, it will pause at the places you want them to respond to check for understanding. You can create different types of questions and it tracks all the student responses! Students do not need a login, which in elementary school that just makes things much easier! I have played around with other sites that have similar features, but eduCanon is my favorite. Here is a great tutorial by them for how to use. 3. Blendspace 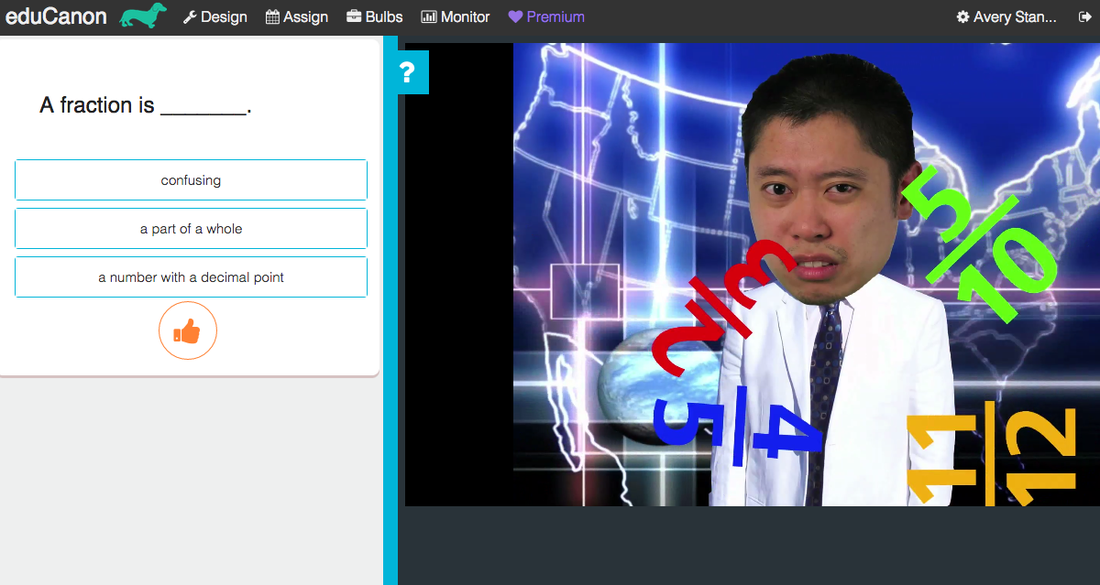  Blendspace allows you to create a flipped classroom with multimedia. You can create a lesson by searching on the right side for any media. You can search from YouTube, Google, ShowMe, Dropbox, Google Drive, and pull up URLs. Just drag what you want to the lesson space and give it a title. Because they are numbered, students know what order to go in. It's very easy to drag the elements around to change the order. You can also add quizzes to hold students accountable in any part of your lesson. Students do not need a log-in and you can simply put a link to the lesson on your website.
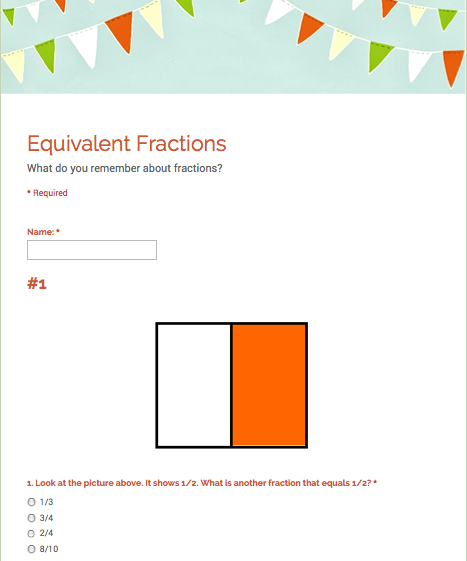
In 4th grade, we are getting ready to start a reading unit on The One and Only Ivan. The lesson had a lot of reader response questions that students use a notebook record their thoughts in. I really wanted to find a way to expose the students to some new technologies to increase their engagement. Because there are several videos involved, I decided to use Blendspace as the canvas for the lesson. Blendspace is a fantastic tool that allows you to create flipped lessons by simply searching for content and then dragging and dropping it in the order you want. You can add YouTube videos, Google content, documents from your Google Drive, pictures, text, Dropbox content, and links to other websites. The genius of Blendspace is that the content opens in the same window so you don't have a messy chain of windows and tabs. I have only the first week of lessons below (a 4 week unit). It integrates Google Forms, Padlet, and Today's Meet. I used ThingLink to explain each section of the Blendspace lesson below.  I learned about Nearpod about 2 months ago and couldn't wait to try it out. I recently used it for a 4th grade mini-lesson on word choice to support our informational poster unit. Here is a short write-up about my experience using it. What is Nearpod? Nearpod is like an interactive PowerPoint that allows a teacher to be in control of the presentation that appears on students' computers, laptops, or mobile devices. The teacher creates a presentation that has built in interactive features to increase student engagement. Some of these features include a poll, multiple choice quiz, drawing, and short response. The teacher can see as students submit their answers or ideas and then choose to share ones they want to acknowledge. Data from what students respond with is tracked into reports that the teacher can access later. 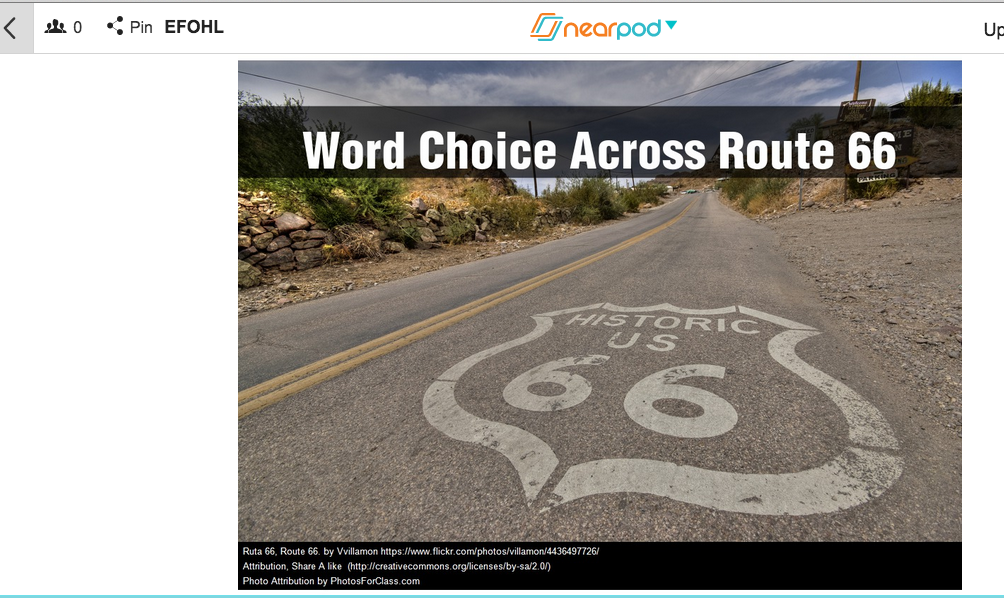 How I used it I first shared with students a 3 minute video clip I found on YouTube that is a time lapse video of driving from Chicago to Santa Monica on old Rt. 66. This helped fill the time of laptops logging in and troubleshooting login problems. Of course the mobile cart hadn't been plugged in before this, so I was stuck with a cart of laptops in which half were at the end of their charge. All worked out though and students were directed to go to the Nearpod website. Once at the website, I gave them the code to access the lesson. First, students were give a chance to respond to a poll about if they had ever been on a long road trip before. I shared with them the pie chart that reported the results. Then, students read 2 simple paragraphs to get some background knowledge about what Route 66 was. Students were then shown a picture of the jackrabbit, one of the weird roadside attractions along the road. I had a boring sentence written and asked the students to type a sentence that had stronger word choice. As students submitted their responses, I read through them with the general ed teacher and once they were all in we shared a few. Nearpod allows the teacher to select an answer and share it so it appears on everyone's screen. Students verbally shared compliments for different shared responses. Next, students saw a picture of the bridge that bends halfway through and saw 3 sentences I had written. Using the draw feature, they underlined the words they thought I used that were strong word choice. After submitting them and sharing as a class, we moved on to the pictures. Students saw 5 different odd roadside attractions that they had the chance to scroll through and study at their own pace. They worked in partners to write 2-3 sentences that described their attraction with strong word choice. To end the lesson, we shared some of the strong sentences we saw and the class gave compliments about why they thought it was strong word choice.  Reflection
I can't wait to use Nearpod again! There are a few things I would remember the next time I use it. There is a little arrow in the upper right hand corner when you are in live mode. Students need to be directed not to click it or it exits them from the presentation. This happened during the lesson however it was easy to have the student log right back in in a matter of seconds. Unless you upgrade to the paid version, you are limited in how much content you can have in your presentation. There are also some other great features that only come in the paid version. In all, I think this would be a fantastic way to replace those horrible worksheets in the social studies and science packets. Grade 4 – Explanatory/Informative Writing Research Report Overview: This lesson not only integrates technology, but also Writing and Reading Informational Text Common Core Standards. Prior to the lesson, students are surveyed using Google Forms to gather information as a teacher about topics of interest. After being immersed into the research genre, students use Padlet as a way to collaborate on taking notes. Then, students type their draft using Google Docs so the teacher can provide immediate feedback and suggestions. After finishing the revising and editing stages of writing, students use their expertise about their subject to create mini-documentaries using iMovie. The class celebrates and shares their projects by holding a film festival. The main technologies that will focused on below are Padlet and iMovie. Detailed Lesson Plan (download):
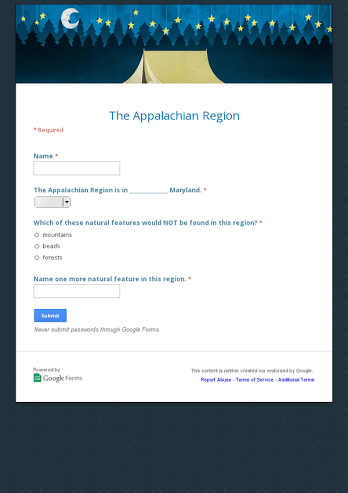
Everything You Need to Know About the Technology Used: 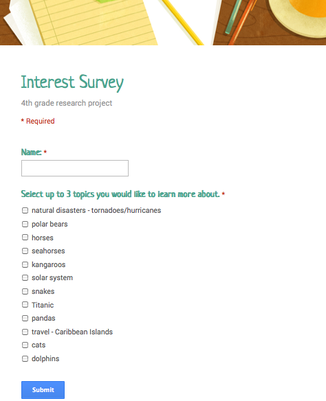 Google Forms This tool is part of Google Apps and is very easy to use. You can create surveys and assessments in a matter of minutes. It allows you a variety of response types such as multiple choice, text box, longer text response, drop-down menu, and checkboxes. Answers are automatically generated into a Google Sheet for immediate feedback. This tool saves teachers time from having to bring home worksheets or sort through paper surveys. In this lesson, Google Forms is used to create a quick interest survey of students to determine what topics they would be interested in researching. Giving students the choice increases engagement in the project. Other Uses
Padlet Padlet is an web-based tool that allows multiple users to post ideas. The users can post text, add a URL, upload a file, and take a picture to post. Depending on how you set the privacy settings, you can allow multiple users to work on it with just the click of a link and no sign-in required. In this lesson, students learned how to identify the main idea and details from informational text. They worked in groups to research their chosen topic and wrote in their findings in their notebooks. After having a student with cognitive disabilities participate, I found that using Padlet would be the perfect fit and help the research process go faster. Here is an example of what my student created for his tornado research: 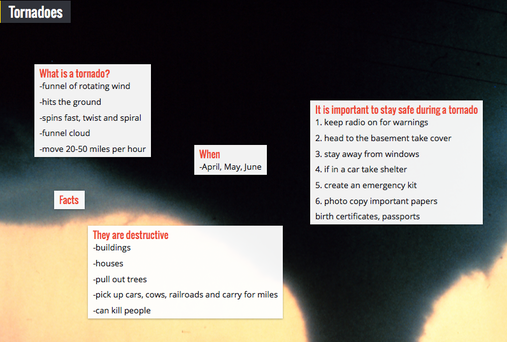 Video Tutorials for Teachers and Students:
iMovie iMovie is an Apple product that is used for creating dynamic movies with photos, videos, text, music and sound effects, and special effects. There are a lot of hidden tools built into the program like adding picture-in-picture and using green screen to add fun background effects. For the purpose of this lesson, students have written individual research papers after collaborating on notetaking with a group. Now, students work in pairs to create a documentary about their topic for a class/school film festival. I created a very short example of a mini-documentary with some of the effects students could use and shared it. Here is an example of one of the movies a student group created: Video tutorial for students on how to use iMovie: Resources about iMovie:
Other Uses:
Reflection:
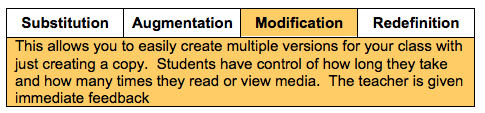
This lesson was based off how I would change the way we just instructed it. For starters, the students actually did their note-taking in their notebooks and it made it difficult to jump around from each main idea because they didn't leave enough room. I felt like there was no reason students couldn't collaborate on taking notes because they were in the same group. For these reasons, I feel the use of Padlet is on the modification level of the SAMR model. Using Padlet allowed for collaboration from school or home, and students could easily adapt the space as certain topics got longer. Students could also easily snap pictures of diagrams or pictures to have on their Padlet wall. This couldn't have been done on just a piece of paper. The use of Google Forms to poll the students on their interest levels would be at the augmentation level. While it's replacing what could have been a paper and pencil task, it's adding convenience with immediate feedback generated into a spreadsheet. I feel using Google Docs to write/revise/edit their reports is also at the augmentation level. Again, it replaces a pencil and paper task, but students do not need to recopy their draft into a final copy. This saves a huge amount of time and helps student develop their word processing skills. The final project, the iMovie has students combining drawings, photos, text, and audio into an authentic product. The students have to collaborate to determine what information they feel is most important to share. Because of all the components that went into making this movie, and the higher-order thinking students had to use to synthesize all their knowledge, I would rate it at the modification level. When we had the students do this in class, we had them make a movie with their whole animal group. It was hard for 4-5 people to all collaborate on the movie at once, so the general education teacher, reading specialist, and I decided having them make the movie in pairs would be more productive. We also learned that this was the first time all but 2 of the students had ever used iMovie so it took much longer than expected. I highly recommend using Mac laptops over the computer lab because we ran into barriers with taking turns recording the audio. Using the laptops would have allowed them to go out in different parts of the hallway to record. Overall, I felt this lesson definitely created a more learner-centered experience for the students and I was thrilled to see how engaged they were in all parts of this research unit. Evaluated on ISTE-T Standard #1: Facilitate and inspire student learning and creativity Teachers use their knowledge of subject matter, teaching and learning, and technology to facilitate experiences that advance student learning, creativity, and innovation in both face-to-face and virtual environments. a. Promote, support, and model creative and innovative thinking and inventiveness Students were encouraged to be creative with their iMovies by being shown how to use the program, but allow them to determine what information they shared, the effects, music, and text. Students also had the chance to add in their own artwork or diagrams. The students found creative ways of using the Ken Burns effect to add movement to their images. b. Engage students in exploring real-world issues and solving authentic problems using digital tools and resources The students had the opportunity to research a topic they were interested in. Along the way, some of the groups found issues associated with their animal. For example, the polar bear group became really interested in global warming when they learned it was melting their homes. One of my students researched tornadoes and it lead him to create a poster showing how to stay safe if there is a tornado warning. c. Promote student reflection using collaborative tools to reveal and clarify students’ conceptual understanding and thinking, planning, and creative processes I feel one of the greatest challenges in any writing lesson is getting the students to reflect more in the revising and editing process. It's hard to express just how realistic it is that writers are constantly trying to make their work better. As teachers, we were able to encourage collaboration on students editing each other's work by sharing their file on Google Docs. Planning out their work on Padlet definitely allowed for collaboration in a new and engaging way. I wish we had a little more time to have the students reflect on the movie-making process and what they could have planned better to be more effective. d. Model collaborative knowledge construction by engaging in learning with students, colleagues, and others in face-to-face and virtual environments Using Google Forms, Padlet, and Google Docs all allowed for the teacher to model the collaborative knowledge construction. The teacher can provide feedback to students through all 3 of these virtual environments. Tech Resource: Google Forms Appropriate Grade Levels: K-12 Overview: Google Forms is a versatile tool that is part of Google Docs in the Google Drive. Forms allows you to create forms, surveys, and assessments with a variety of response types such as multiple choice, short answer, paragraph text, drop-down menu, and checkboxes. You can also upload images and videos into your form. The creator can customize their form to be as many questions as they like and insert page breaks if creating a longer form. There are a variety of pre-designed templates to add some pizzazz to your form. Once your form in created you can send the link for anyone you want to complete it. As people complete the form, their answers are automatically populated into a new spreadsheet within your Google Drive. If you want multiple people to be collaborators on creating your form, such as all the teachers on your team, you can just add their names with editing rights. Tutorial: This is a basic guide to creating a simple classroom assessment. Classroom Uses:
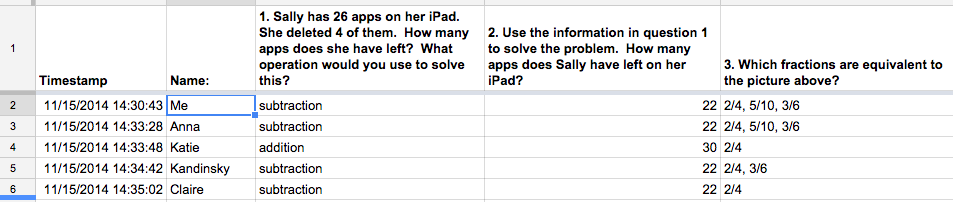 This is an example of the student responses spreadsheet that Google Forms automatically generates. Analysis: 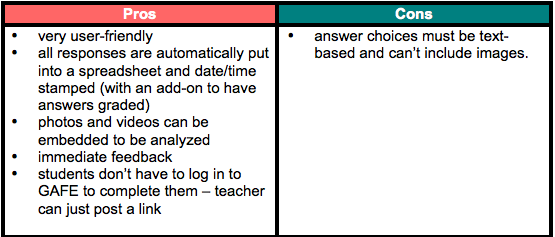 Alternatives:
What's being said:
Evaluation: Web 2.0 Technology Selection Criteria
My classmate Veronica shared this with me and I got a good laugh out of it. It mocks Apple commercials but I relate it to trying to make a student excited about using a textbook when there are so many digital alternatives out there and textbooks will be obsolete in the years to come. |

TeacherI am a special education teacher in Howard County, MD. I co-teach lessons to provide a more inclusive education for students with disabilities. I am currently earning my masters in educational technology from Loyola University. I love to use technology to find ways to make learning more engaging, meaningful, and accessible to all learners. Archives
May 2015
Categories
All
|
||||||||||||||


 RSS Feed

